

Ricky's Isonychia Nymph by Ricky Bassett
Mar 05, 2015

Hook: Partridge Nymph Long
Thread: Superfly Superthread - Brown 8/0
Rib: Pearsalls Brown Silk
Tail: Magnum Rabbit Zonker Frost Tip – Burnt Orange and Black
Gills: Ostrich Herl Natural Dun
Dorsal Strips: Stripped Hackle Quill
Shellback:Mottled Turkey
Wing Case:Mottled Turkey & UV Resin.
Body, Thorax & Head:Muskrat mixed with shades of brown & red seal or muskrat mixed with red yarn.
Legs:Partridge Feather

Create a thread base on the hook shank, and cut a small piece of silk thread for the rib. Tie it in and bind it to the near side of the hook shank while advancing the thread down to the bend of the hook.

Cut a small bundle of hair from a frost tip rabbit zonker in burnt orange and black, about the width of a hook gap. Hold it in your right hand, gage the proper length so that the tips will extend to the half way mark on the hook shank. Grab the tips of the fanned out bundle with your thumb and fore finger of your material hand. You want the tail to show the transition from the burnt orange tip to the blackish-brown, slightly softer base hair. The tail will later be trimmed to a fanned out, blunt shape which is quite short. (This is a material that was shown to my by a very talented fly fisherman/tyer named Joe Goodspeed who chose this material not only for the perfect color but more so for its movement in the water, which accurately imitates the movement of these very efficient swimming nymphs.

Capture and bind down the tail with a few firm thread wraps securing it on top of the shank. With your thumbnail, press up against the material to splay out the fibers to a natural shape. When in the position you are happy with, firmly tighten the thread pulling straight down. Advance the thread forwards, binding the rest of the material to the top and sides of the shank of the hook. Trim excess. This will aid in creating the underbody of the fly.

Next, you will bind down the material used to create the dorsal stripe (a creamy white, thin stripe on the back or top of the abdomen). For this demo I am using a slightly thicker stripped hackle quill but I prefer something a bit finer in diameter, but still strong and pliable. Normally I like to use porcupine, these materials will hold there color well when wet. Capture on top of the shank at the halfway point, binding it down and advance rearwards to the hook bend.

Now tie in the section of mottled turkey for the shellback about the width of the hook gap. Bind it down to the top of the shank by the tips, with the dull side of the feather facing up. Advance your thread rearwards until you reach the bend.

Select 3 barbs of natural grey ostrich hurl, nice bushy ones. Again, capture them in binding them and advancing rear to the hook bend.

With the dubbing you have mixed, spin a good amount loosely onto the thread. Wrap it onto the hook shank, trying to build that natural taper. Try to keep a wide flat buggy shape. Leave enough area for the thorax.

Using a toothbrush (or dubbing brush), brush out the fur from both the top and bottom pulling it to the sides to create the wide flat natural profile. This will also help to simulate the gills.

Trim the top and bottom to flatten the body and accentuate the side gills. Additionaly, you can give the side gills a light trim to create a cleanerook, but don't overdo it and trim them too short.


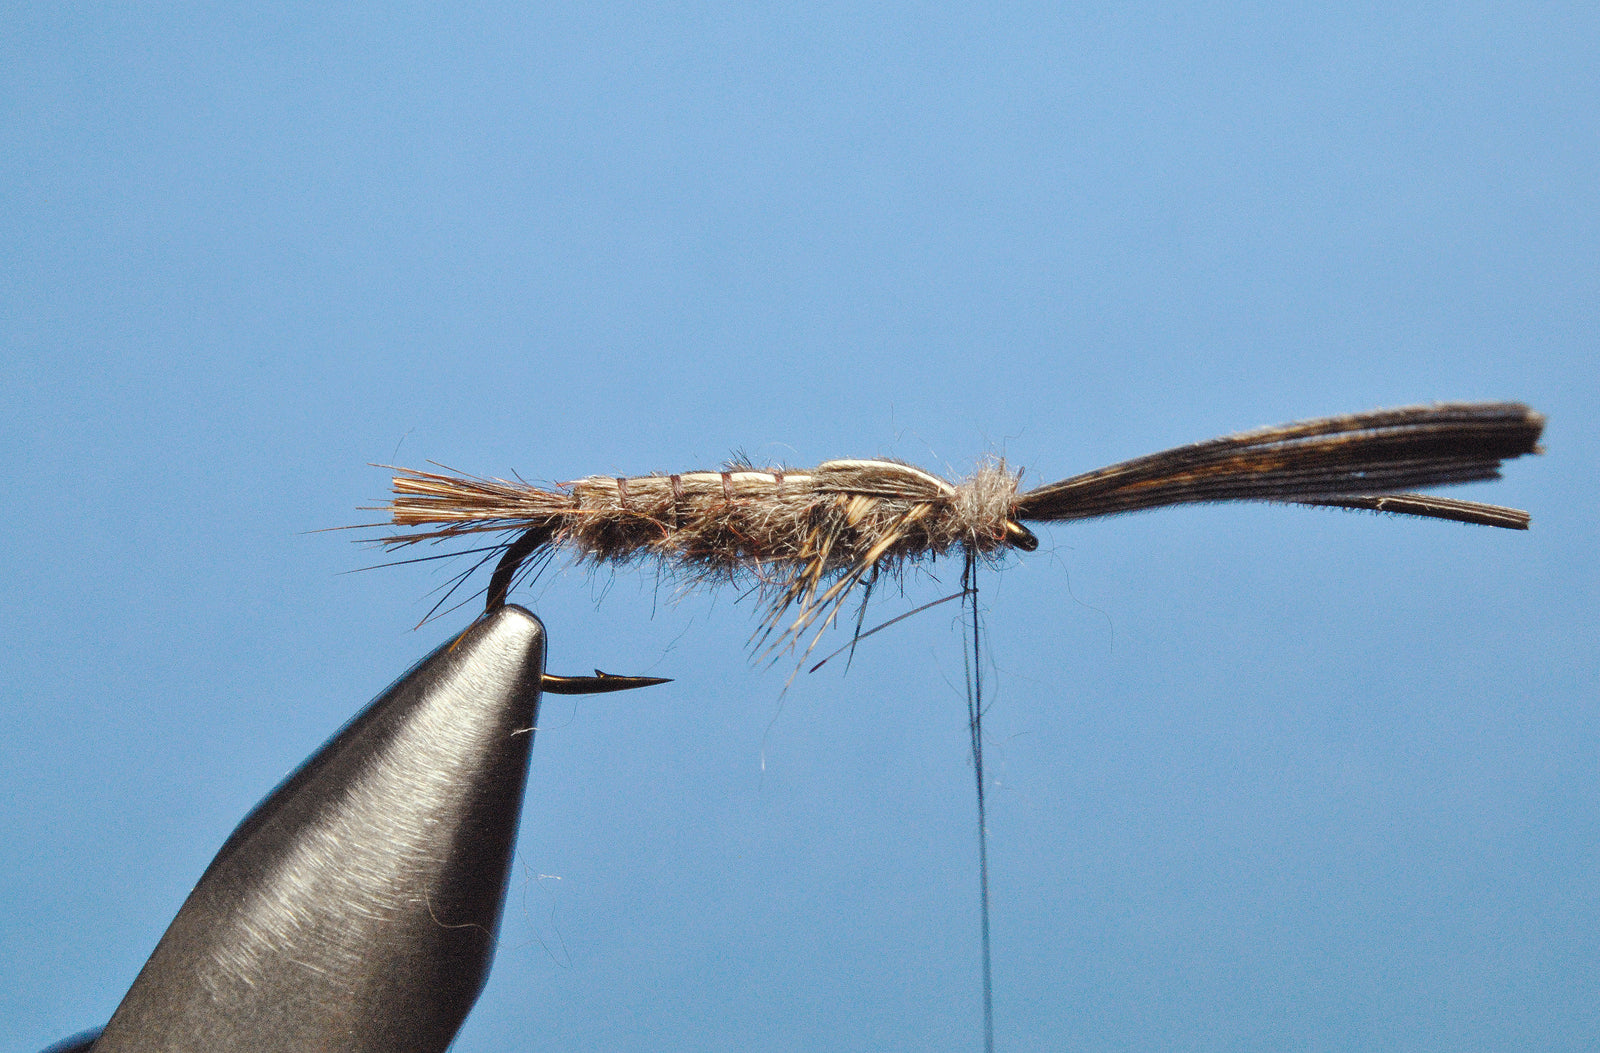
These are looks at the abdomen after the final trim, from the side and the top.

Twist the ostrich hurl into a rope but not to tight because they can break with too much tension. Begin to wrap the rope of ostrich hurl up the abdomen with open turns keeping even spaces. Capture and trim excess. This will form the gills and add some movement in the water.

A look after the ostrich is wrapped.

Pull the shellback over the top of the abdomen and capture and secure with a few tight thread wraps. Trim the waste. Next grab hold of the stripped hackle quill or dorsal stripe material and pull it forwards, keeping it centered in the middle of the shellback. Capture and secure it with a couple tight wraps and trim the waste.

Now grab hold of the ribbing material and with even spaced open wraps, rib the abdomen trying to keep the dorsal stripe centered while wrapping. Secure the rib and trim the waste. At this point (or whenever you feel comfortable) you can trim the tailto a flat uniform length to about the same size as the hook gap.

You will now select another section of stripped hackle quill and mottled turkey. Tie in the dorsal strip first and then the turkey slip, trimming excess. I actually take a few wraps back up over the abdomen to almost the halfway point.

Choose a partridge feather with proper length barbs for the hook (about half of the shank). Holding the tip of the feather, preen back the first 4 or_5 barbs closest to the tip. remove the barbs below to make a clean and neat tie-in and finish. You can slightly wax the feather tip if desired to make it easier and neater as well.

Tie in the partridge feather by the tip with the pale inside of the feather and secure with a few tight wraps.

With the dubbing mix, apply a small amount to the thread (you don't need that much) and wrap towards the eye with a slight reverse taper.

Pull the partridge feather forward and capture and secure with a couple tight wraps. Trim the waste.

Pull the wingcase forward and secure it with a couple of tight wraps, do not trim the waste. Now pull the dorsal strip forwards keeping it centered over the wingcase, and secure it with some tight wraps but try not to build bulk. Trim just the stripped quill.
This step is completely optional. You can simply trim the waste and whip finish the fly. Otherwise, dub a small head wrapping backwards, away from the eye of the hook. 2 - 3 wraps with a sparse amount of dubbing is all you need. The thread should be positioned as seen in the photo.

Pull the turkey slip rearwards, covering the head and secure it with two tight thread wraps. Whip finish the fly directly where the thread is currently positioned, behind the dubbed head, and trim all excess. The fly is now complete, the last thing that I will do is coat only the wingcase with Deer Creek Diamond Fine Tack Free UV Resin.
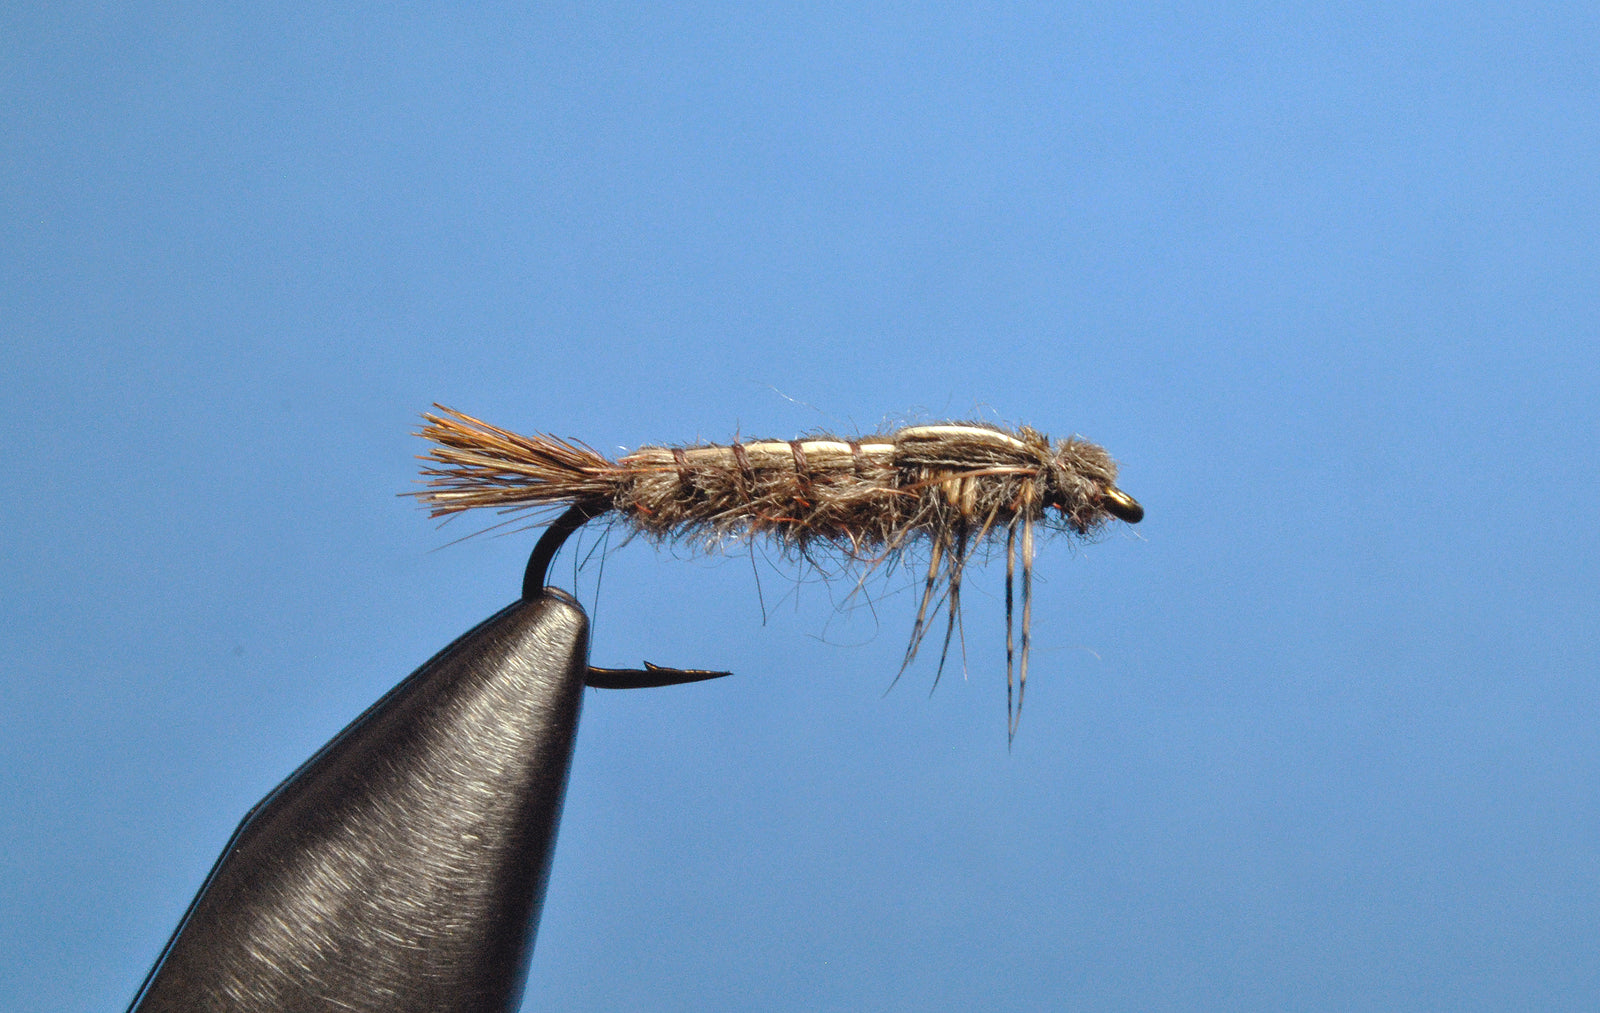
Finished.


2 comments
how can I get this fly?
Love your flies and Thanks for the tying guides.