

Loop Wing CDC Emerger by Ricky Bassett
Jan 16, 2015
If you have trouble finding a peacock tail support feather there are many other feathers that can be used in a pinch to create a very nymph like body with a natural, mottled nymph look. A few readily available feathers that will also work include; different shades of pheasant tail feathers or wild turkey tail feathers. They can be found in light and dark shades with some very interesting markings and color variations. There are many more feathers that can also be used so don't limit yourself to just one, part of the fun of tying is experimenting with a wide range of materials.
Hook: Partridge Czech Nymph Fine
Thread: Superfly Superthread - Brown 8/0
Loop wing: CDC Feathers - Dun
Rib: Copper Wire X-Fine & Sybai Flat Tinsel Ultraviolet
Tail/body: Peacock Tail Support Feather, 4 Barbs
Legs: Partridge (tip from one feather)
Thorax: Beaver Dubbing - Grey Olive

Start off by placing a Partridge Czech Nymph Fine #20 in the vice and Attach the thread onto the hook shank and trim the waste.

Advance the thread toward the hook bend stopping at almost the half way point, you will notice the first section of the hook shank directly behind the eye is almost perfectly straight. You will see a noticeable change in angles at almost the halfway point this is where you will tie in the tips of two cdc feathers. Choose two CDC feathers of similar shape and line up the tips of the feathers.

While holding the two paired, alligned CDC feathers, transfer them to your left hand taking hold of the tips. Start by grabbing them by the butts and slide your thumb and forefinger towards the tips of the feathers. This will help to gather all the barbs making it much easier to tie in. Capture the feathers and tie them in by the tips. The two feathers should be positioned on top of the shank so that the feathers almost wrap around the top half of the shank. The butts should extend over the eye of the hook. Do not trim the butts or the tips. The butt will be pulled rearward later on to form the loop wing, and you will bind down the tips with thread to help form the taper of the body.

Without repositioning the thread, you will take hold of both ribbing materials. With both the x-fine copper wire and flat UV tinsel in your left hand (material hand,) angle the tips downward as shown. Now take a couple firm thread wraps capturing and binding them to the hook shank.

Bind down the ribbing materials as well as the tips of the CDC. Continue advancing the thread rearwards toward the hook shank, creating a nice taper. The ribbing material should be positioned downward on the near side, facing you but not completely under the shank. Position the thread at the hook bend, where the tail will be tied in. You will use three to four barbs from a peacock tail support feather. These barbs will create the tail as well as the body.

Select three to four barbs from a peacock tail support feather. These barbs will create the tail as well as the body. Holding the tail feather in your hand, position them 90 degrees from the stem to line up the tips. Remove them from the stem by either pulling them off or snipping them close to the base with some scissors. Measure out the length of the tail by holding it next to the shank of the hook, the tail should be slightly more then half the length of this hook. Be conscious of the tapered under body.

After you've gauged the length, transfer the bundle of fibers to your material hand grabbing the tips between your thumb and forefinger. I place the top of my thumb directly on top of the hook shank with my forefinger against the far side of the shank of the hook to hold the barbs directly on top of the shank. Now capture the barbs with one firm thread wrap, holding the barbs tightly in place. Pull the thread down and forwards 45 degrees as shown to compensate for the curve of the hook.

Continue to hold the bobbin with the same firm pressure and pull the butts of the fibers rearward taking a few tight thread wrap underneath and in front of the bundle onto the hook shank. Once there are a couple good wraps onto the shank the tail will be secure and you can remove your finger from the far side of the shank. Continue advancing the thread forward. Do not trim the butts as they will be used to wrap the abdomen.

While advancing the thread forward you can finish building the taper of the under body to your preference similar to the photo. Position the thread a little more than the half way mark, but not directly up to the CDC.

Take hold of the bundle of barbs. I use my fingers to wrap them but you can use a pair of hackle pliers if you'd like. Wrap the barbs so they lay flat, one next to another in a clockwise direction, away from your body.

Advance forward with each turn touching the previous until you reach the thread. Catch the barbs in with your thread with a couple of good tight wraps. Once secure, holding the butts in your material hand firmly pull them rearwards and trim them close to the base.

Take hold of the U.V. tinsel and begin wrapping counter clockwise this time, towards your body, in evenly spaced open wraps securing the herl body. Wrap the tinsel up to the position of the thread and secure with a couple tight wraps. Trim the tag end.
Now take hold of the fine copper wire and again wrap towards your thorax to just behind the UV tinsel. When you reach the top of the abdomen, catch the wire with your thread with a couple tight wraps. Trim the tag end.

With your material hand, pull the top CDC feather rearwards on the close side of the shank and bind it down tight with one tight wrap.

Now do the same exact thing with the second CDC feather, but on the far side of the shank. Secure with a couple tight wraps.

Now, take a third CDC feather. Capture this one by the tip with the butt facing backwards down the hook bend as shown. Bind down the tips and begin wrapping rearwards over all 3 of the CDC feathers to the half way point of the hook shank. (One feather centered on top of the shank with the other two on each of the sides of the hook shank. This third feather will be used to secure the legs.

Prepare the partridge feather for the legs. Choose a feather with the markings, coloring and size that you like. By preening back an equal amount of the barbs on both sides of the feather, leaving the first few really small barbs intact, you will create a tip for capturing with the thread.

With the pale side facing upwards, holding it by the butt in your material hand, rest the tip of the feather directly on top of the shank and directly in front of the CDC. Capture the feather, and take a couple of tight thread wraps securing the tip. Trim any strays and wrap the thread back to the half way mark on the shank.

Spin some pale olive-grey beaver dubbing onto the thread.

Wrap the dubbing creating the thorax, making sure not to go all the way up to the eye. Stop about 2/3 of the way to the eye.

Pull the partridge feather forward towards the eye like you would if it were a wing case. Make sure you have it positioned the way you want, then catch the stem with the thread and bind it down good with a couple tight wraps. Trim the waste.

Pull the centered on top, third CDC feather forward, firmly over the partridge feather. This is meant to secure the partridge feather and will help to prevent it from moving around or breaking. Capture it with a couple tight thread wraps and remove the waste.

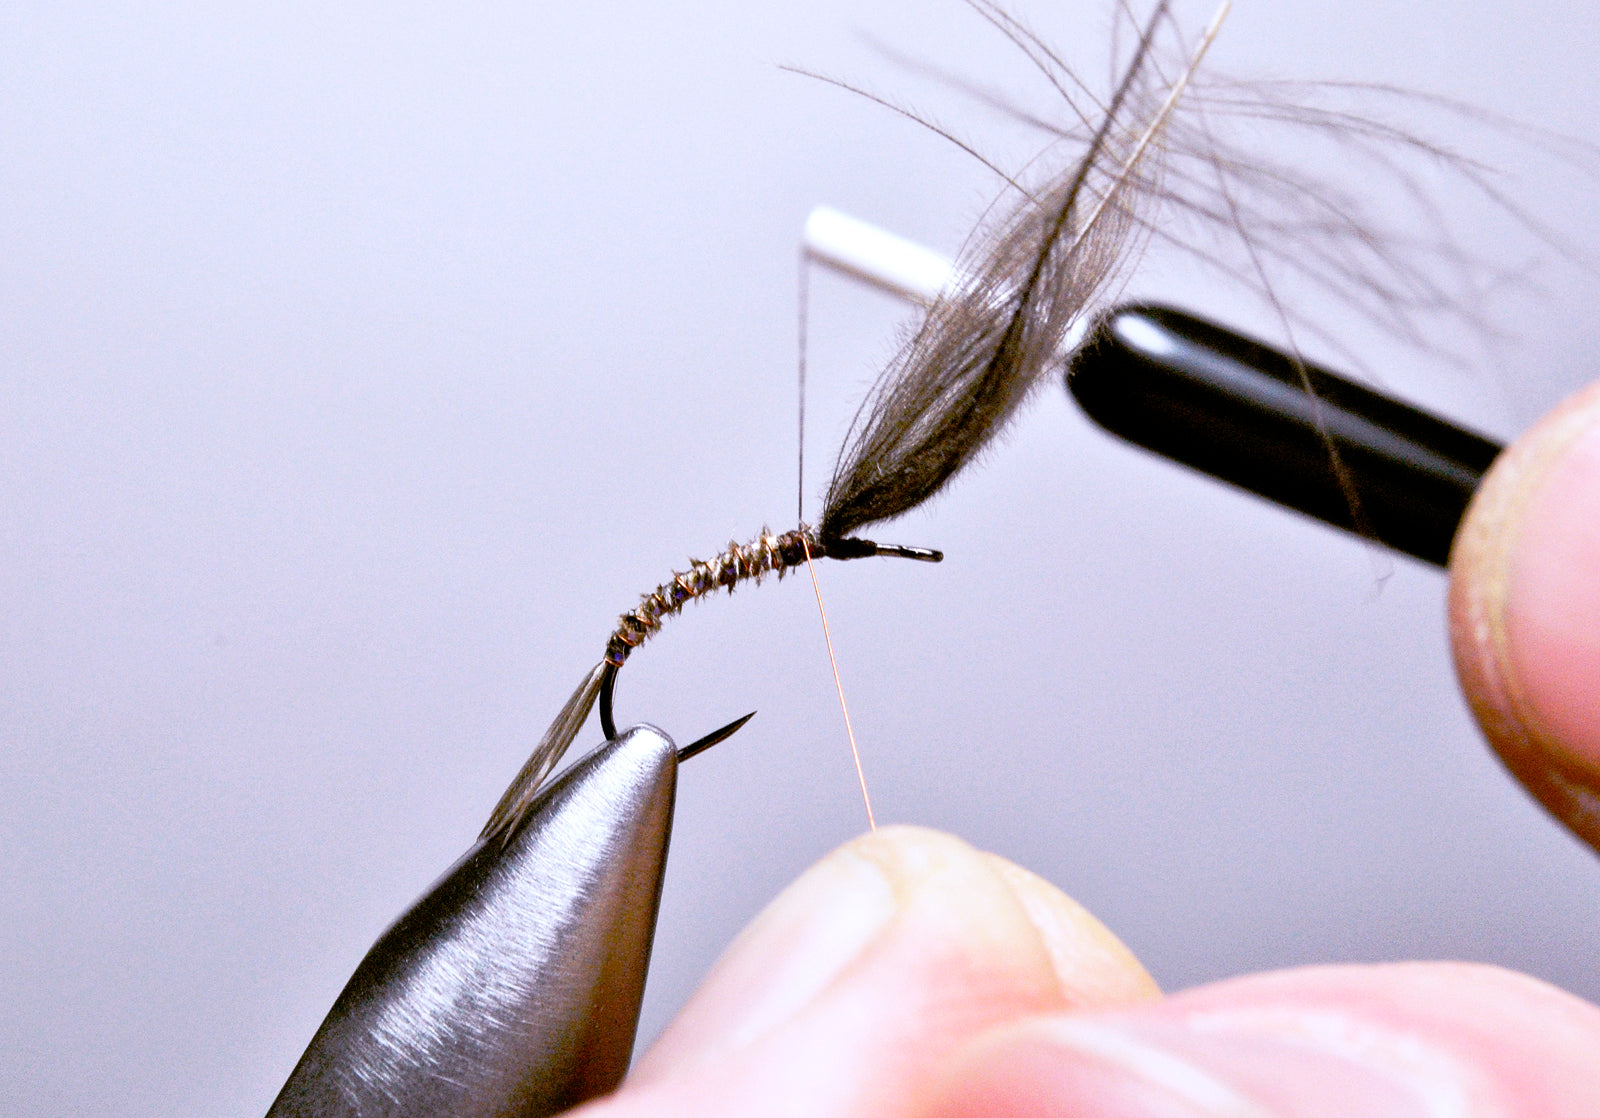
Now take hold of two remaining CDC feathers by the butts and pull both of them forward. Secure the CDC with a couple loose wraps so that the loop wing can be adjusted.

The loose binds of the two CDC feathers will allow you to be able to manipulate them to the desired shape. I am using my dubbing needle here, but feel free to use any tool you have that you think might do the job. Open the loop wing slightly, and when you have it in the position you like, take a couple of tight wraps to secure its final position.

Trim the butts of the CDC, but not too close to prevent any barbs from slipping over time.

Whip finish the fly.

Finished.

