

Quill Body Soft Hackle with Nicole March
Feb 02, 2018
Thread: Black 8/0
Uni 8/0
Superthread 8/0
Body: Polish Quill - Brown
Hackle: Dark Mottled Partridge Feather
Dubbing: Dark Brown Nymph Dubbing mixed w/ Pink Ice Dub

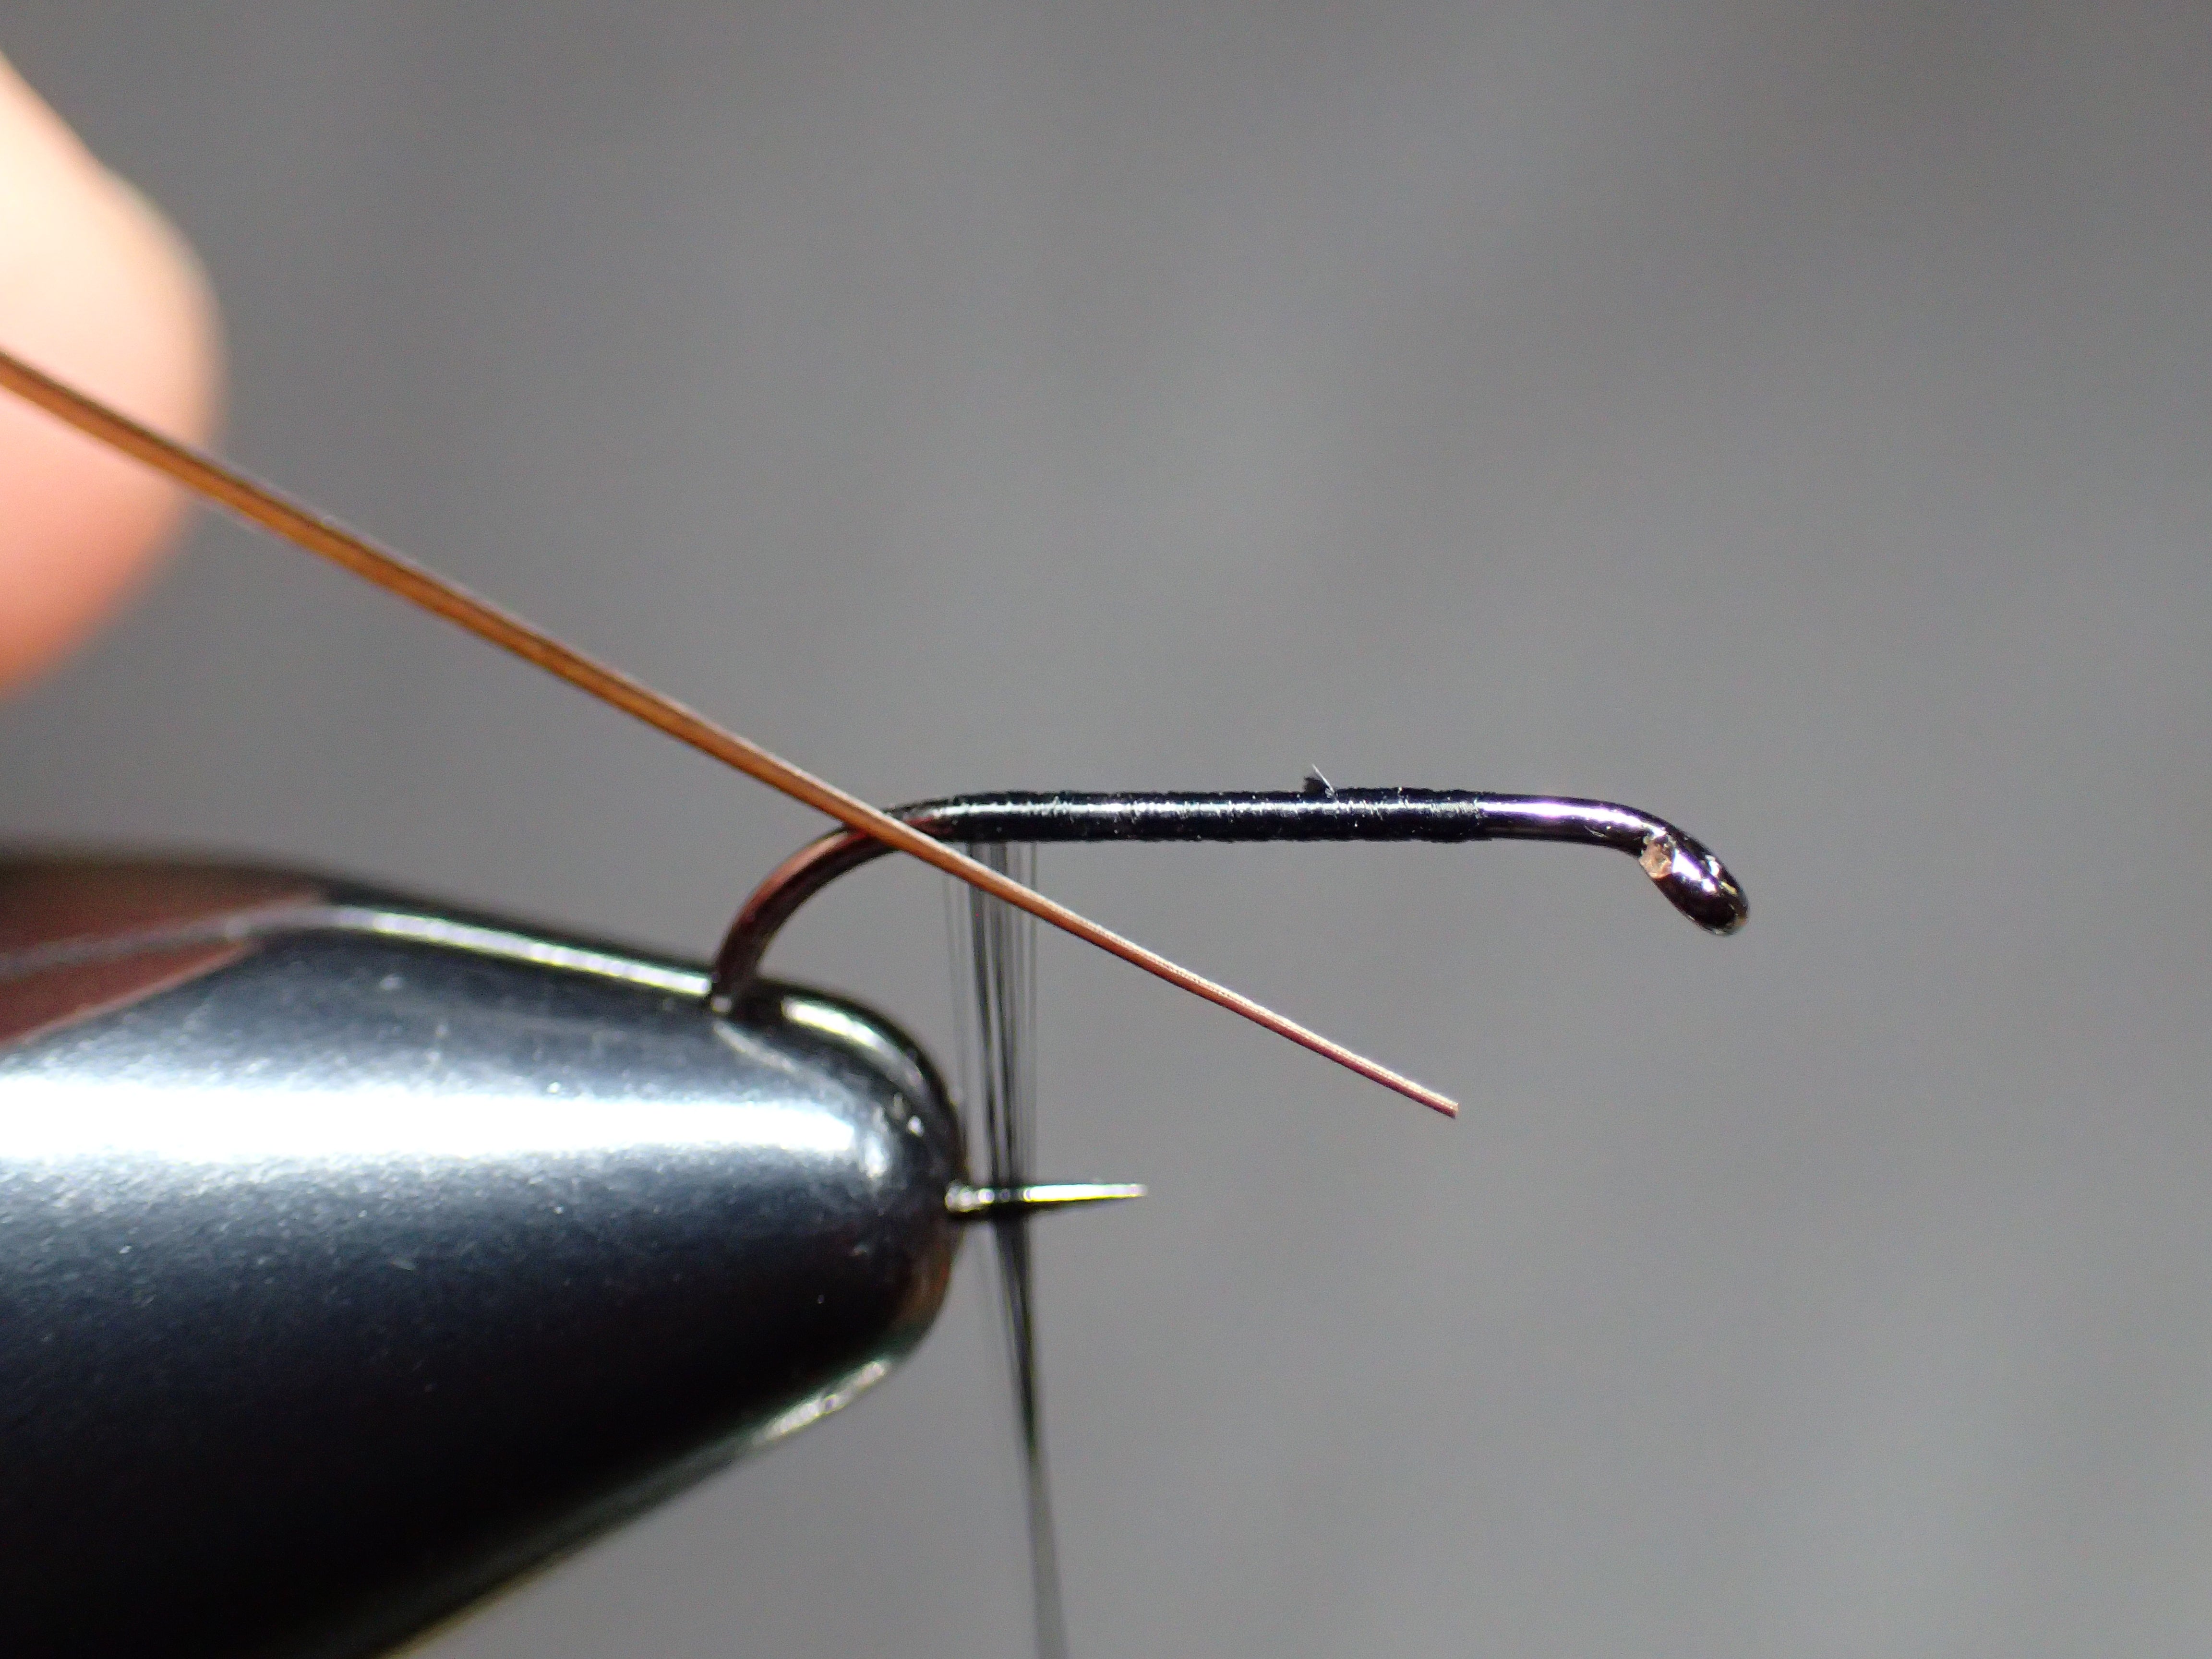
Begin by securing your hook in the vise and starting your thread one hook eye length behind the eye. Take touching turns down the shank, stopping your thread across from the barb.


Select a brown polish quill from the package; and since this may be your first time working with them, we will give it a quick once-over. What you will notice is that the quill itself has a dark stripe running down one side of it. What this means is that depending on which way you tie them in and wrap them forward, you will either have a segmented body or more of a solid colored body. You will also notice that there is a piece of peacock herl at one end; this is the end that we will prep and tie in from.

Prep your quill by snipping off the peacock herl and positioning it in on the side closest to you above the barb so that you can give it a once over before tying it in. Position the quill with the black stripe facing up, as shown in the photo.


Now hold that same position, stripe on the top and move the quill to the top of the hook shank and take one or two wraps to secure it in place. Rule of thumb (bear with me now) Is that If you tie them in with the black stripe positioned on the top of the quill and wrap forward, you will have a segmented body- simply because the black stripe is in the same position on the back side of the quill as well.
One way to check this is to take one or two wraps to secure your quill into position, and then bend the quill over as if you were going to tie. Take a look at it. If you were to hold it vertical, is the stripe on the left now? If so you are ready to go. If not, and you found it to be on the bottom, then untie it and tie in again in the upside down position to see if that fixes it.

Once you have secured your quill in the correct position you are going to create a uniform underbody. This is the most important step when it comes to tying with quill bodies. All of the neatly placed quill wraps in the world won’t do your fly justice if you have a miss-shapen and lumpy underbody. With that being said; use steady pressure and begin to compress the waste ends of the quill.


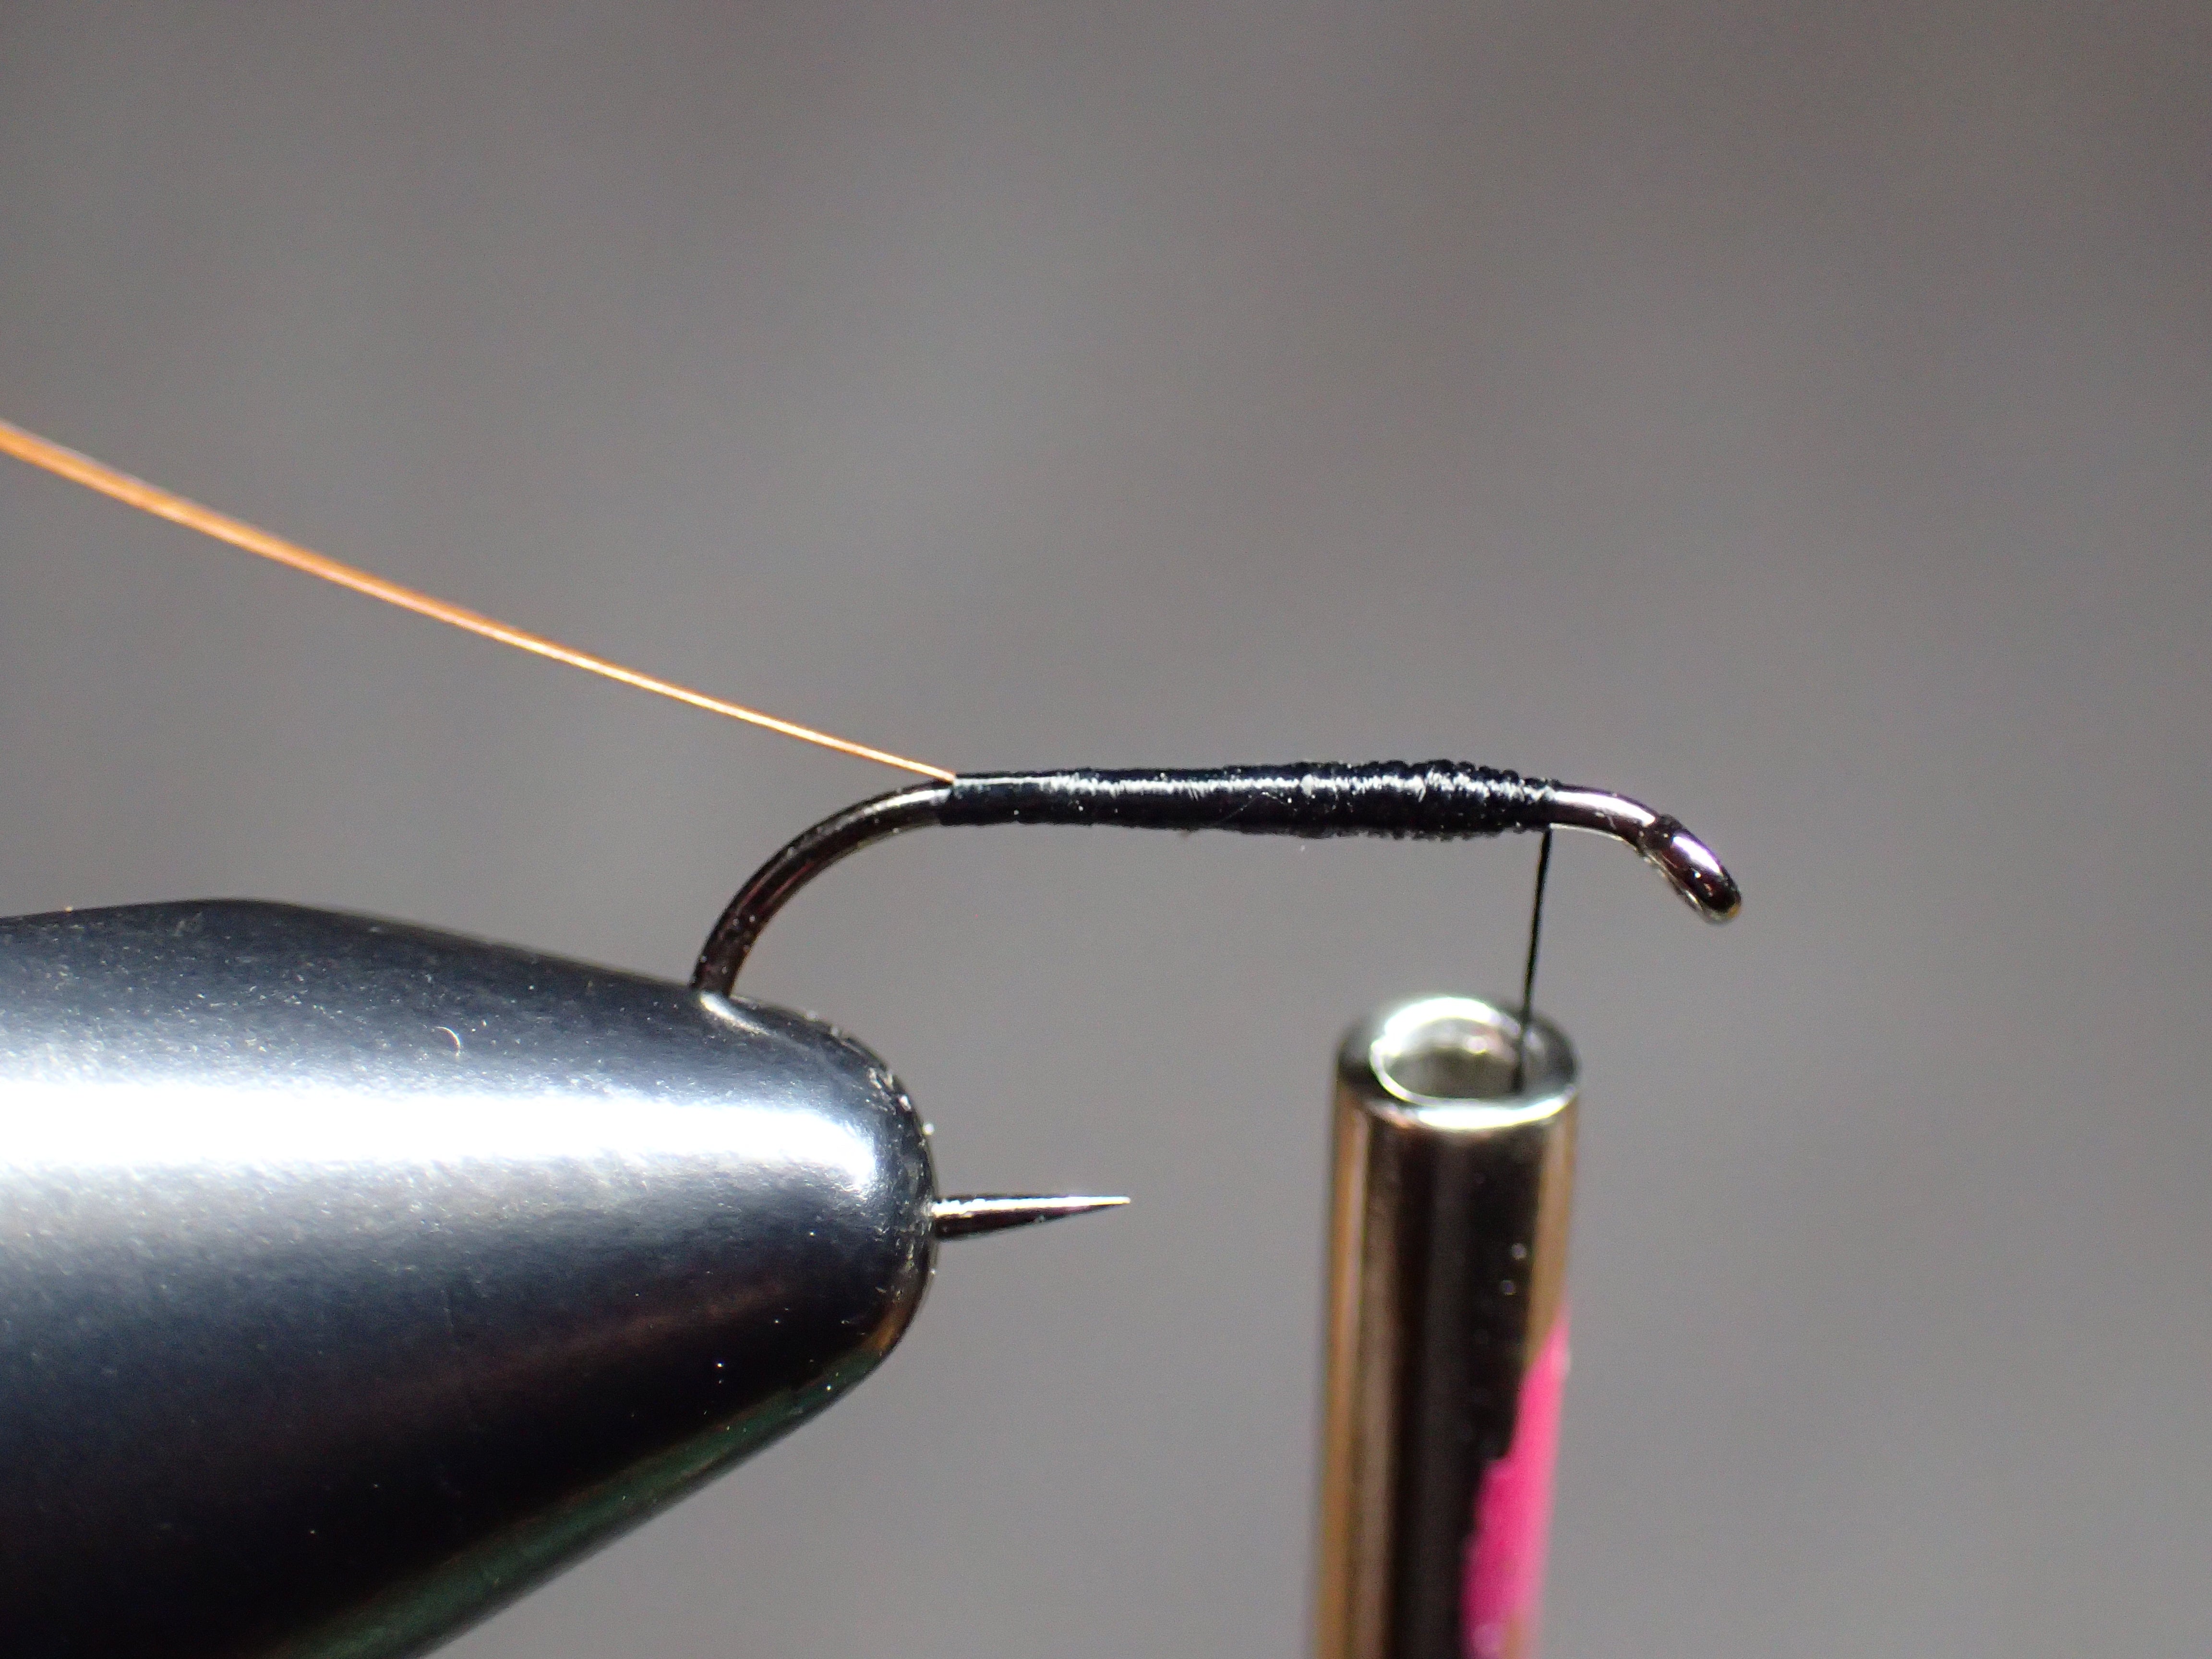
Now begin taking wraps forward with the thread, keeping it flat so as not to twist. If you notice that your thread has gone from looking like smooth flat thread to this twisted rope; give the bobbin a counter-clockwise spin to untwist it. One way to achieve a uniform underbody Is by varying the direction of your thread wraps. For example wrapping towards the hook eye for 4 or 5 wraps, then back towards the bend for 2 or 3 and repeating this with different numbers of wraps as you move towards the eye. This will vary the wraps and help to build up in one direction while keeping the other direction down in size. Continue tapering the body until you have reached the place where you initially started your thread behind the eye, and stop.


With the underbody tapered, carefully grasp the quill with your hackle pliers and bring it up and over the hook.

Taking evenly overlapped turns, and being careful not to hit the hook point as this will break the quill; wrap forward and begin creating the segmented body.


Continue wrapping the quill up the hook shank, stopping it where the tapered body begins. If you find you don't have enough material to reach the exact point, simply tie off where you ended as you should be pretty close. Before trimming your waste ends, I highly suggest taking a one turn whip finish to lock the quill in place before trimming the waste ends
Protecting the quill body


Quill bodies are very fragile and will benefit a great deal from using a UV coating over top of them. Use your favorite thin UV product to coat and cure the body before continuing. If you don’t have any UV you can simply add a drop or two of head cement and spread it out with the bodkin.
Hackle and Dubbing


Before dubbing the thorax you will prep and tie in your hackle. Select a properly sized feather from the partridge skin. You will want the fibers to extend slightly past the hook point when finished and one way to eyeball this quickly; is by separating the feather on one side and holding it over the eye like so.


Once you have selected and sized your feather, hold it by the tip in your ‘non-tying’ hand and brush back the fibers with the other. This will give you a clear tie in point.
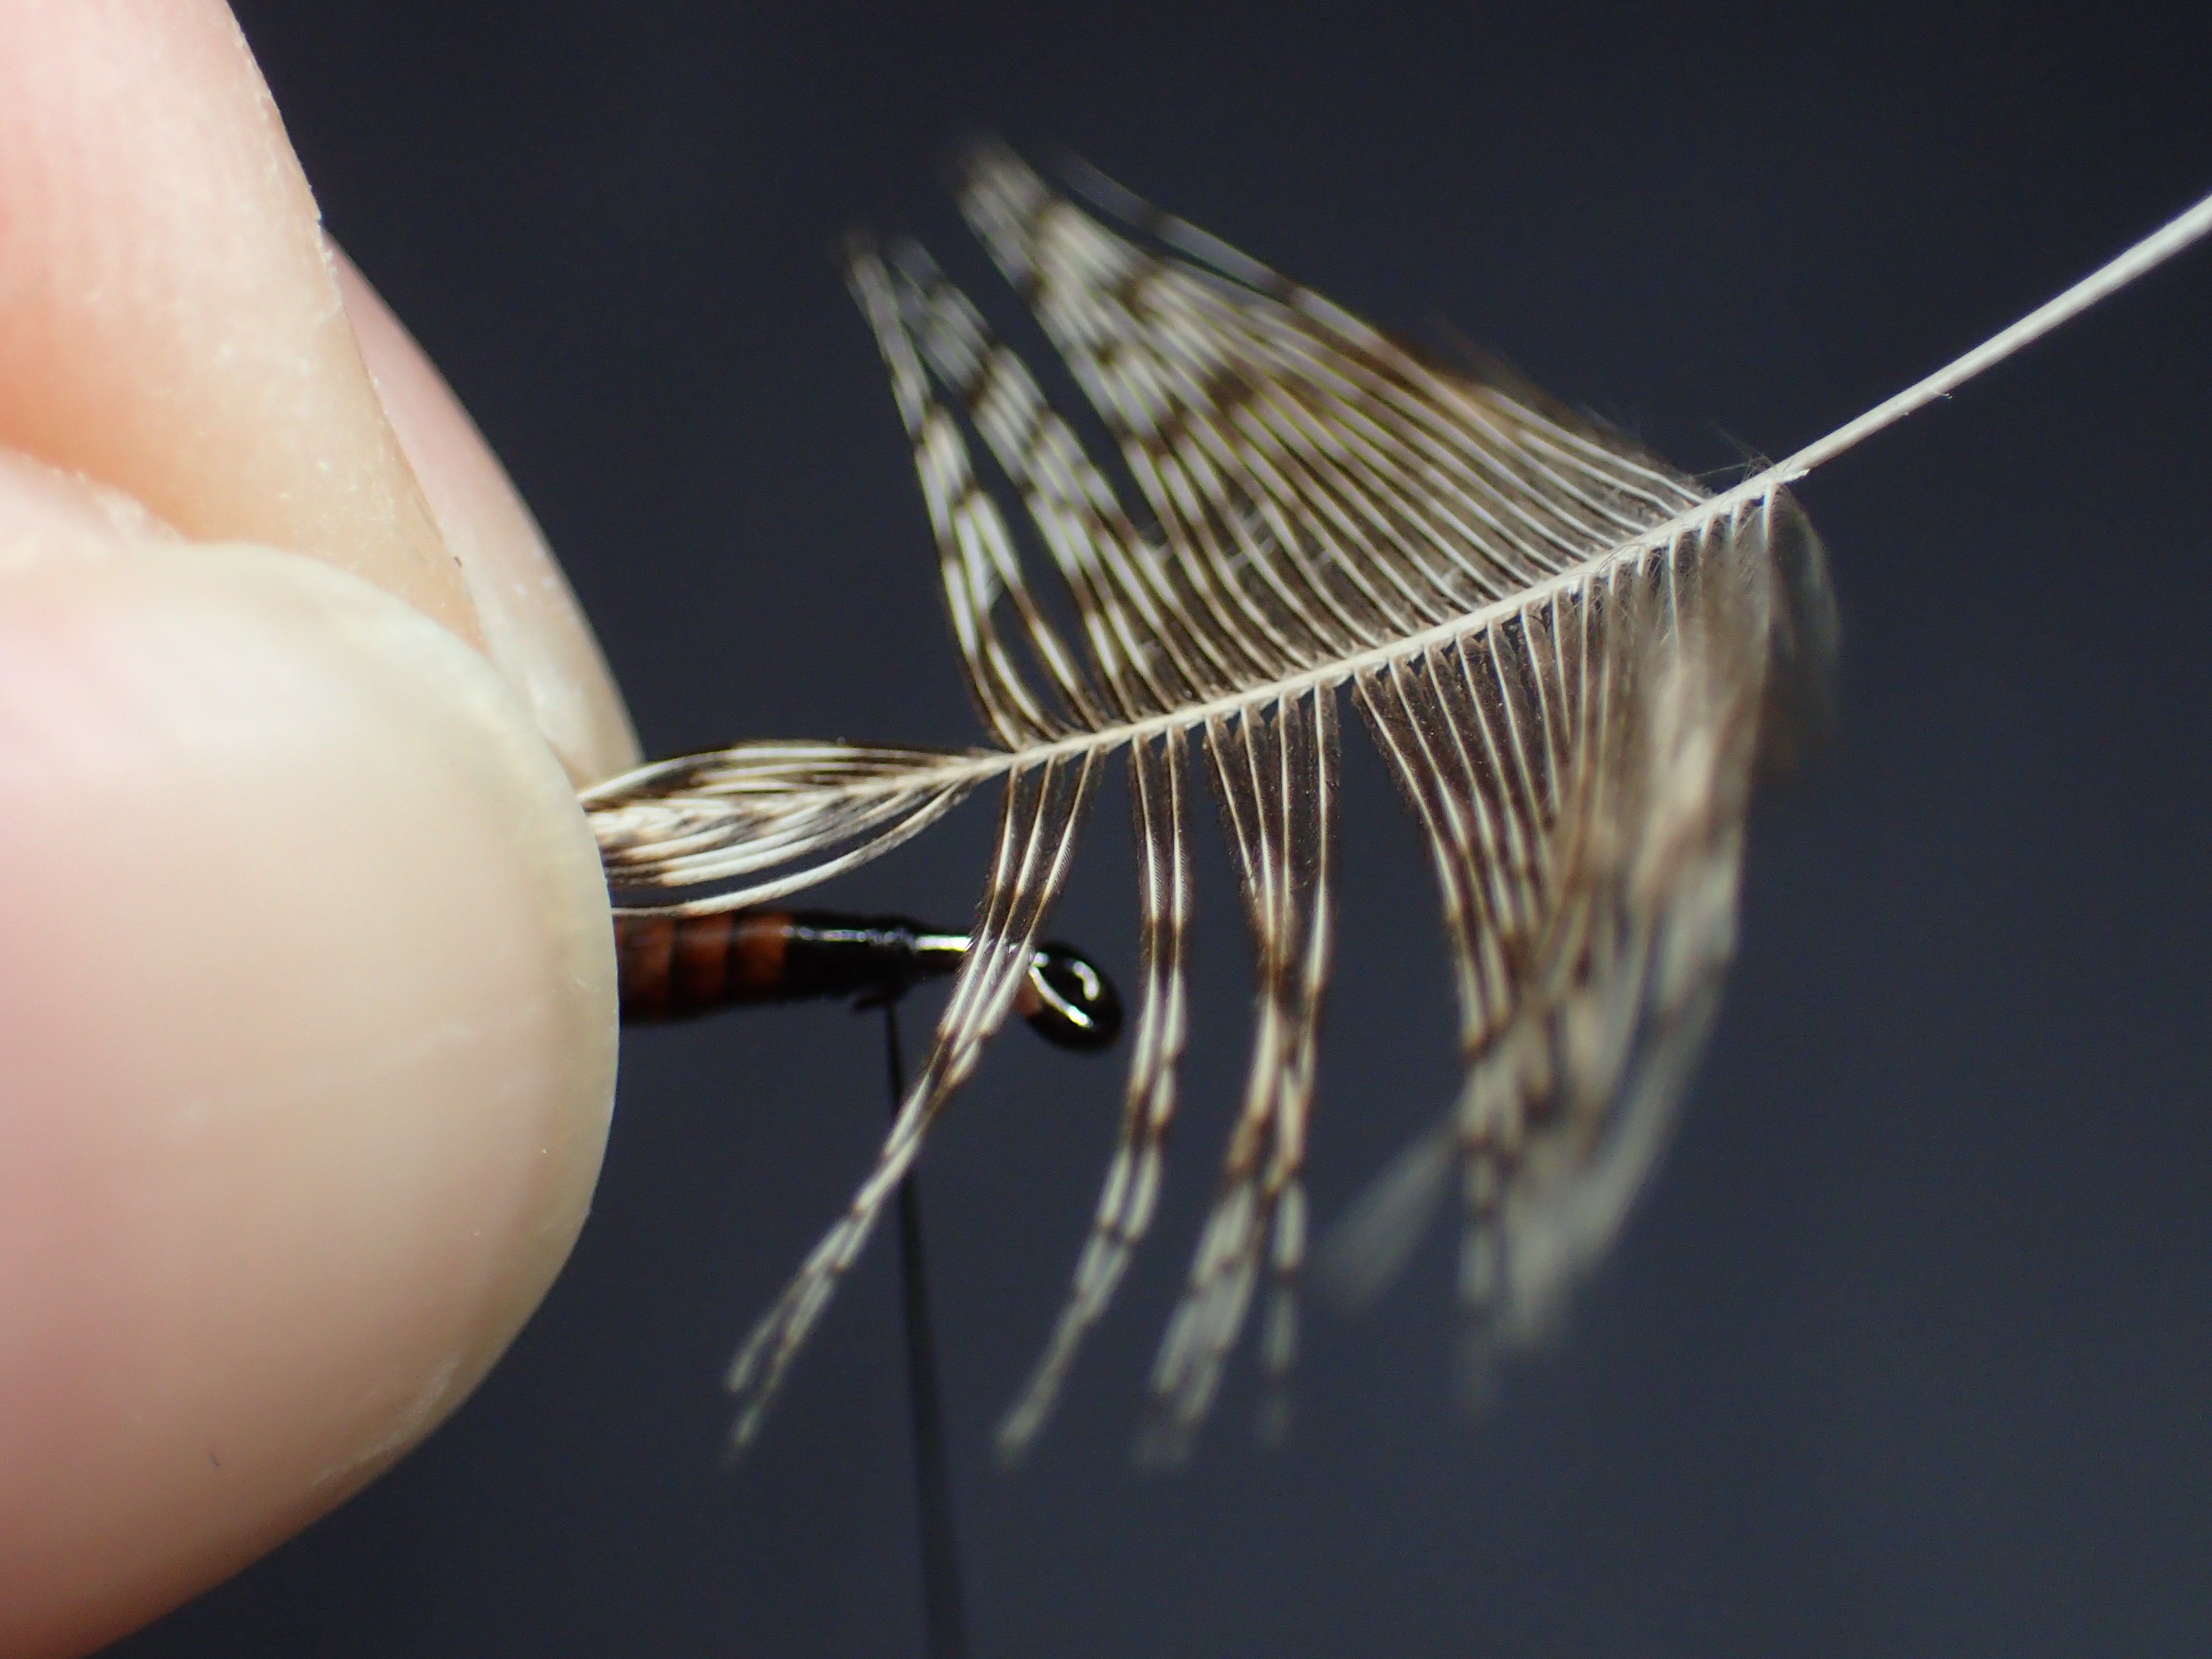

While continuing to hold the feather by the tip, bring it over the hook shank (shiny/mottled side down) and tie it in between the end of the tapered body and the hook eye. This will leave you just enough room to wrap the hackle and create a head later.

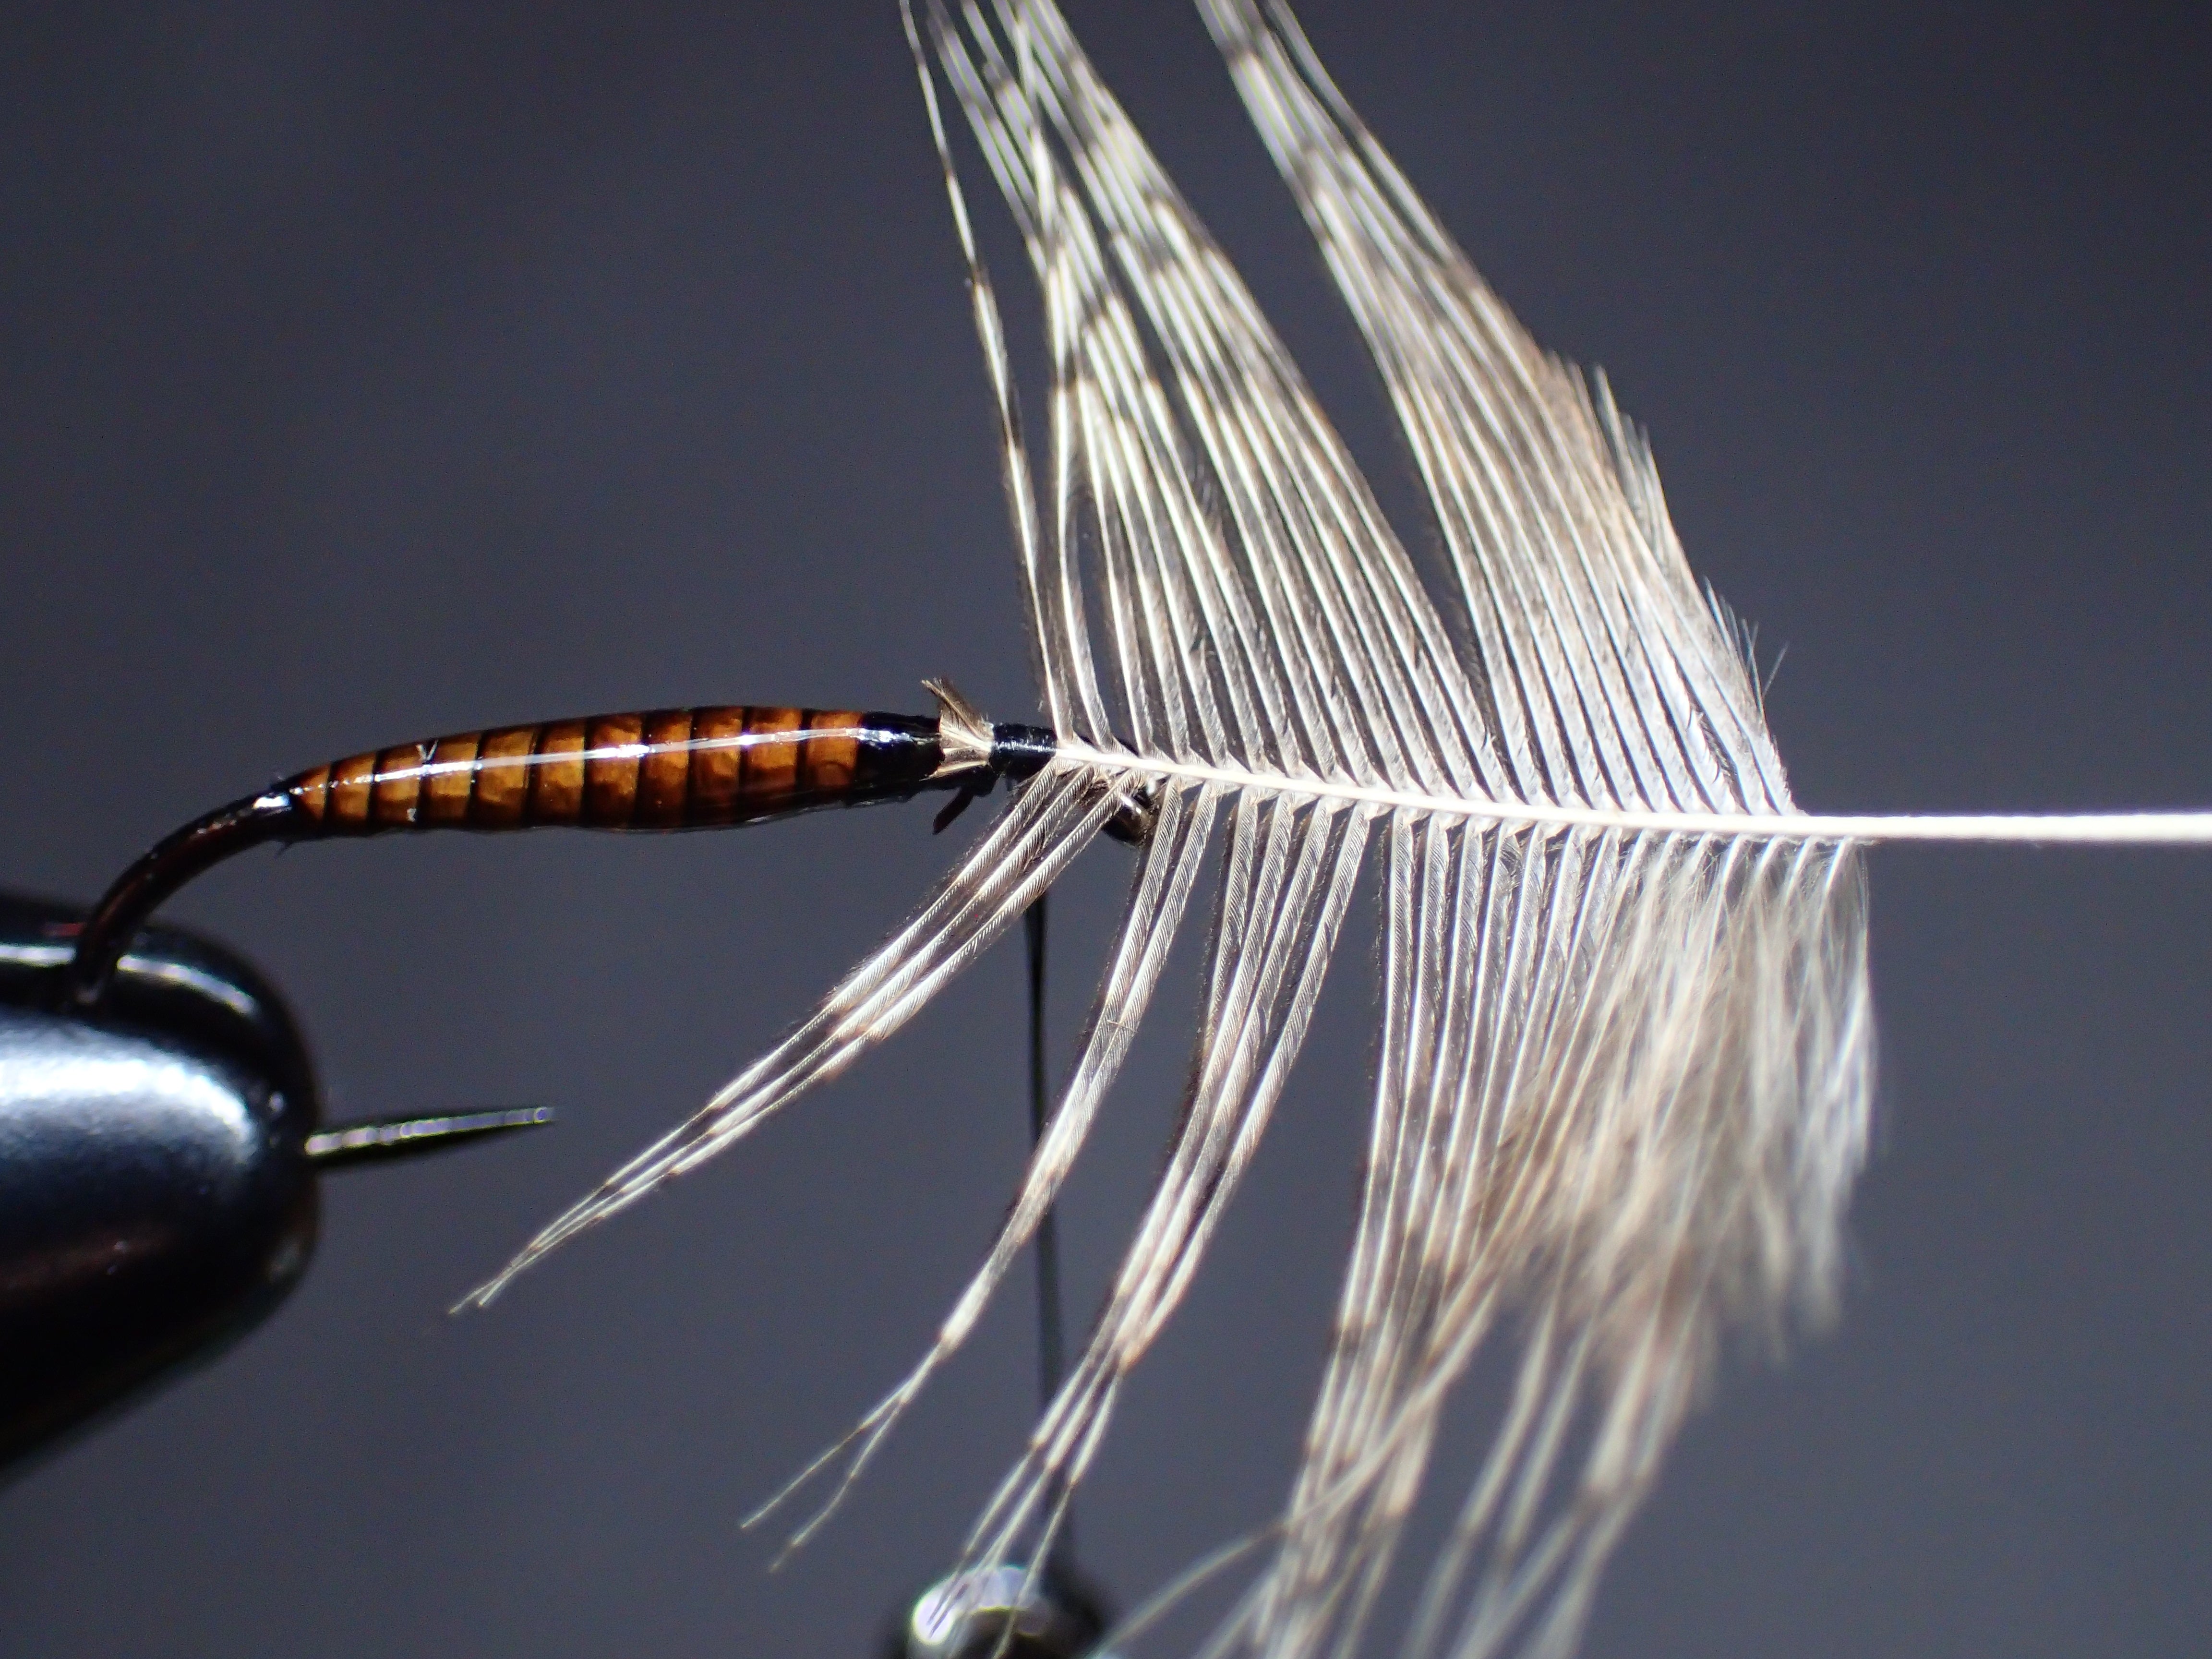
Pull the stem back to ensure that you are not too close to the eye and then cut the tip of the feather off. The tip will be the end that is over the quill body but Don't cut it too close to the thread wraps as you want to make sure it is secure as you bring the hackle around.

Take a small pinch of the SLF squirrel and pink ice dubbing and mix them together in your fingers. I like to do this by stacking two small amounts of dubbing on top of each other and then pulling them apart together. I then repeat this process until I have achieved the mixture I desire.


Create a small dubbing noodle and dub the thorax.


With the thorax dubbed, bring your thread to the front of the hackle and take one wrap.\
Wrapping the hackle

Holding the feather vertical with your hackle pliers, use your “non tying" hand to brush the fibers back from the stem. Take one wrap around the hook shank with the feather, and when you come back around and reach your vertical starting point; brush them back again and take one more wrap.

You want the hackle to be sparse on this fly so two turns should be sufficient. With the hackle complete, tie your material off, pull the stem vertically and take one or two wraps in front of it before trimming the waste ends. This will ensure that you don't end up with a piece of the stem sticking into the eye when you create the head. You can now hold back the fibers, create the head and whip finish before snipping off your thread.

This is an excellent generic soft hackle that will imitate many different species in a trout's diet, but feel free to change the colors to whats relevant to your area. You can fish this as the top dropper in a nymph rig or treat it with floatant to allow it to ride in the film in softer water.


10 comments
I like your step by step instructions, they are much better than videos in my opinion. Do you soak the quills in water or something to make them less fragile? Thanks, I’m looking forward to tying some. Jim.
Can a person buy stripped peacock quills, if so, where??
Nice instructions. Thank you