March Brown Floating Nymph by Nicole March
Apr 26, 2017
Hook: Standard wet/dry fly hook size 12
Partridge Patriot Ideal Dry, Barbless
Partridge Patriot Standard Dry, Barbless
Thread: Brown 6/0
Uni 6/0
Superfly 6/0
Wing: Brown Deer Body Hair
Comparadun Deer Hair
Tail: Pheasant Tail
Body: A mixture of Natural Possum, Brown Fox and Ice Dub (Pearl)
Australian Possum Fur
Ice Dub
Legs: Hungarian Partridge
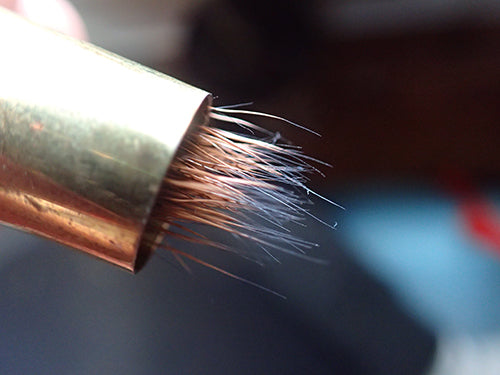
Begin by securing your hook in the vise, then take 5 or 6 touching thread wraps about one hook eye space behind the eye. Select a clump of brown deer body hair, and align the tips using a hair stacker.
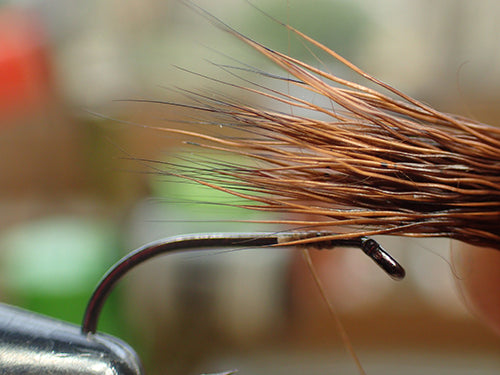

Place your clump of deer hair over the hook shank, and measure it so that the tips land just to the beginning of the hook bend. Once you have decided on placement you want to secure the deer hair to the hook. Take one or two loose wraps just to position the deer hair, and then continue taking tighter wraps to secure it down.

Once you have the wing secured you will need to prop it up. If you were to just leave it like this, it will begin to fall onto the hook shank, and not only will that make it harder to secure your materials under it, it will also hinder it from floating properly. To do this, you will take wraps around the base of the wing. This is the same type of technique you would use to secure upright wings on a Catskill dry fly, in which you are wrapping your thread around the base of the deer hair to prop it up.


Once you have it secure, bring your thread to right behind the eye, lift the waste ends, take a wrap and cut the waste ends off at a 45-degree angle. Take a few wraps over the cut ends, add a drop of head cement and whip finish before cutting off your thread. I tend to take one wrap around the waste ends before snipping them off, but this is optional.

To make sure the wing sits right, restart your thread under the wing and bring it back towards the hook bend, then tie in a few pheasant tail fibers* If you find this to be a little tough to tie in this order, the next time you tie the fly, you can try tying on the tail on first, then the wing.* The dubbing originally used in this fly was beige brown fox fur but I have used a mixture of natural possum, brown fox and ice dubbing here.

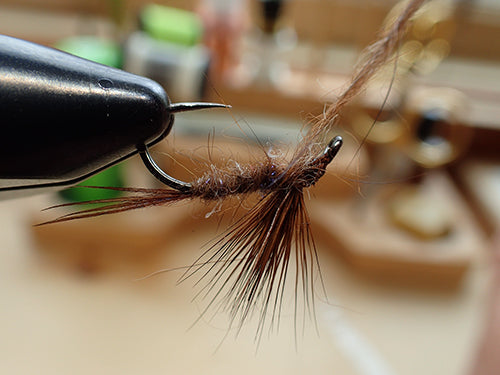
Begin dubbing your fly at the base of the shank. Create your dubbing noodle, then rotate your vise upside down and continue to dub all the way up the hook shank until you are up under the wing.
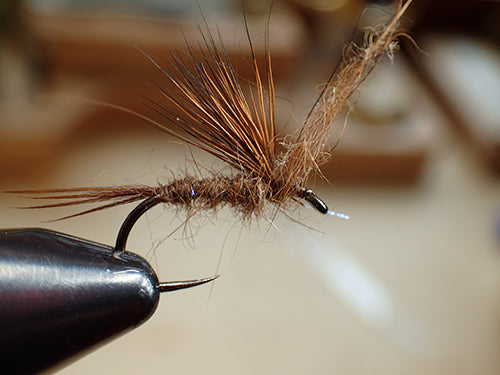
Pull the wing up slightly to take one final wrap under it, then take one or two wraps of dubbing over the waste ends behind the eye to create the dubbed head.
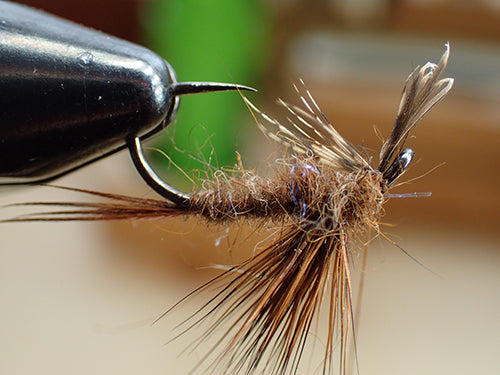
This is a great time to use up some of those “not so perfect" partridge feathers, since we are only using it for legs on this fly so scan the floor or scrap bin for one!
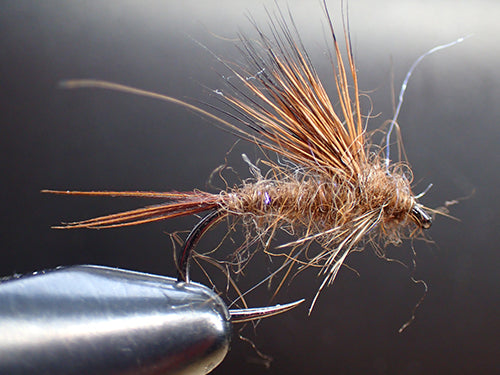
Select a partridge feather, and either grab a few fibers and rip them from the stem or snip the tip of the feathers spine off to leave a “V" shape. Now invert your vise, and tie it in under the fly. Take a one or two turn whip finish and snip your thread. Your fly is now complete. This is a great pattern to fish during a hatch and you can change the coloration and size to match what’s hatching in your area.
Partridge Patriot Ideal Dry, Barbless
Partridge Patriot Standard Dry, Barbless
Thread: Brown 6/0
Uni 6/0
Superfly 6/0
Wing: Brown Deer Body Hair
Comparadun Deer Hair
Tail: Pheasant Tail
Body: A mixture of Natural Possum, Brown Fox and Ice Dub (Pearl)
Australian Possum Fur
Ice Dub
Legs: Hungarian Partridge

Begin by securing your hook in the vise, then take 5 or 6 touching thread wraps about one hook eye space behind the eye. Select a clump of brown deer body hair, and align the tips using a hair stacker.


Place your clump of deer hair over the hook shank, and measure it so that the tips land just to the beginning of the hook bend. Once you have decided on placement you want to secure the deer hair to the hook. Take one or two loose wraps just to position the deer hair, and then continue taking tighter wraps to secure it down.

Once you have the wing secured you will need to prop it up. If you were to just leave it like this, it will begin to fall onto the hook shank, and not only will that make it harder to secure your materials under it, it will also hinder it from floating properly. To do this, you will take wraps around the base of the wing. This is the same type of technique you would use to secure upright wings on a Catskill dry fly, in which you are wrapping your thread around the base of the deer hair to prop it up.


Once you have it secure, bring your thread to right behind the eye, lift the waste ends, take a wrap and cut the waste ends off at a 45-degree angle. Take a few wraps over the cut ends, add a drop of head cement and whip finish before cutting off your thread. I tend to take one wrap around the waste ends before snipping them off, but this is optional.

To make sure the wing sits right, restart your thread under the wing and bring it back towards the hook bend, then tie in a few pheasant tail fibers* If you find this to be a little tough to tie in this order, the next time you tie the fly, you can try tying on the tail on first, then the wing.* The dubbing originally used in this fly was beige brown fox fur but I have used a mixture of natural possum, brown fox and ice dubbing here.


Begin dubbing your fly at the base of the shank. Create your dubbing noodle, then rotate your vise upside down and continue to dub all the way up the hook shank until you are up under the wing.

Pull the wing up slightly to take one final wrap under it, then take one or two wraps of dubbing over the waste ends behind the eye to create the dubbed head.

This is a great time to use up some of those “not so perfect" partridge feathers, since we are only using it for legs on this fly so scan the floor or scrap bin for one!
Select a partridge feather, and either grab a few fibers and rip them from the stem or snip the tip of the feathers spine off to leave a “V" shape. Now invert your vise, and tie it in under the fly. Take a one or two turn whip finish and snip your thread. Your fly is now complete. This is a great pattern to fish during a hatch and you can change the coloration and size to match what’s hatching in your area.



3 comments
Very sweet & buggy fly. I’m also going to morph your pattern a little bit and tye a cripple parachute emerger version.
Thanks
Sweet, buggy tie. Nice job, I’m going to also tye it on a Daichii 1130 to create a cripple parachute
Nice Tie, nice buggy looking fly. Thanks!