

The Usual by Nicole March
Mar 19, 2020
The usual was created by Fran Betters, and don’t let the fact that it’s tied with only one material fool you! This pattern has been a proven fish catcher for many years. The fur from a snowshoe rabbits foot is naturally buoyant and is great for emerger and comparadun type patterns. The fur will be taken from the underside of the snowshoe rabbits hind foot and while its simple enough to clip it from the bottom, some of us find that breaking the toes apart (meaning splaying them like an open hand) will also yield a great deal of excellent material.
Thread: Fl Orange or Red 8/0
Uni 6/0
Superfly 6/0
Danville 6/0
Tail: Cream Showshoe Rabbit Guard Hairs
Wing: Cream Showshoe Rabbit Guard Hairs
Body: Cream Showshoe Rabbit Under Fur
Two things to keep in mind when tying this pattern; you will want the wing to be about twice the thickness of the tail and that the body is dubbed with the underfur that you remove from the tail and wing before tying them in so don’t discard them once removing!
Step 1

Step 2

Run your thread down the hook shank in touching turns before stopping across from the hook barb
Step 3

Remove your snowshoe rabbits hind foot from the package, and if this is your first time using it; let’s take a closer look at the piece I am holding in my hand. In this photo I am holding the hind foot from the topside of the foot. The fur you will be cutting is going to come from the bottom
Step 4

As you can see, the fur on the underside of the foot is longer and wiry and that’s what we will be using to tie this fly.
Step 5

Keep in mind that this first clump we are tying in will be for the tail, and the tail is usually half as thick as the wing itself. Using the tip of your scissors or a bodkin, separate a small clump of fur from the bottom of the snowshoe rabbits foot at the base and then grasp it in your fingers. Now hold on to that clump while spinning the foot around halfway or so. What this will do is tighten those base fibers that are in your fingers into a tiny rope and allow it to be cut off more efficiently instead of shoving the scissors down in there.
Step 6

With the clump firmly grasped and twisted, cut it off at the base and hang on to it tightly as we have one last Step to complete before tying it in. As you can see here, with the material clipped off you have small and short wiry hairs coming out of the butt end. These need to be preened out first but do NOT discard them as we will be using them for the dubbing.
Step 7


Keeping the fresh cut clump secured in one hand, use your other hand to tease out some of the underfur and place it in a pile on your bench. They will look like a fluffy mess of wiry and corkscrew type fibers as they come out. Continue doing this until almost all of the underfur have been removed. You should have a small pile accumulating on the bench and a pretty clean stack still grasped in your hand.
Step 8


With your thread hanging across from the barb, carefully transfer the clump of guard hairs to your right hand with the tips facing in the direction of the hook bend. While the tips should be pretty even, and you arent looking to tie a perfect fly here; pull out any extra long guard hairs to even out the tips. Hold it over the hook and measure it to about a hook shank in length, before transferring it to where your thread is hanging. Switch hands again and secure it with two or three thread wraps. Cut away some of the excess and wrap over the waste ends.
Step 9


Advance your thread to about a hook eye in length behind the eye, then remove a few wraps. You will want a little more room than normal behind the eye on this fly for creating the head and wing. Twist and remove another clump of snowshoe rabbits fur from the underside of the foot but this time make it a little bit larger, you will want it about twice as thick as the tail. Preen out the underfur, adding it to the pile and transfer the clump to your left hand with the tips extending over the hook eye this time.
Step 10


With the tips extending over the eye, measure the wing to about one hook shank in length. Pull out any extremely long guard hairs to even out the wing, then transfer the bundle to where your thread is hanging. Take two or three wraps to secure it in place.
Step 11

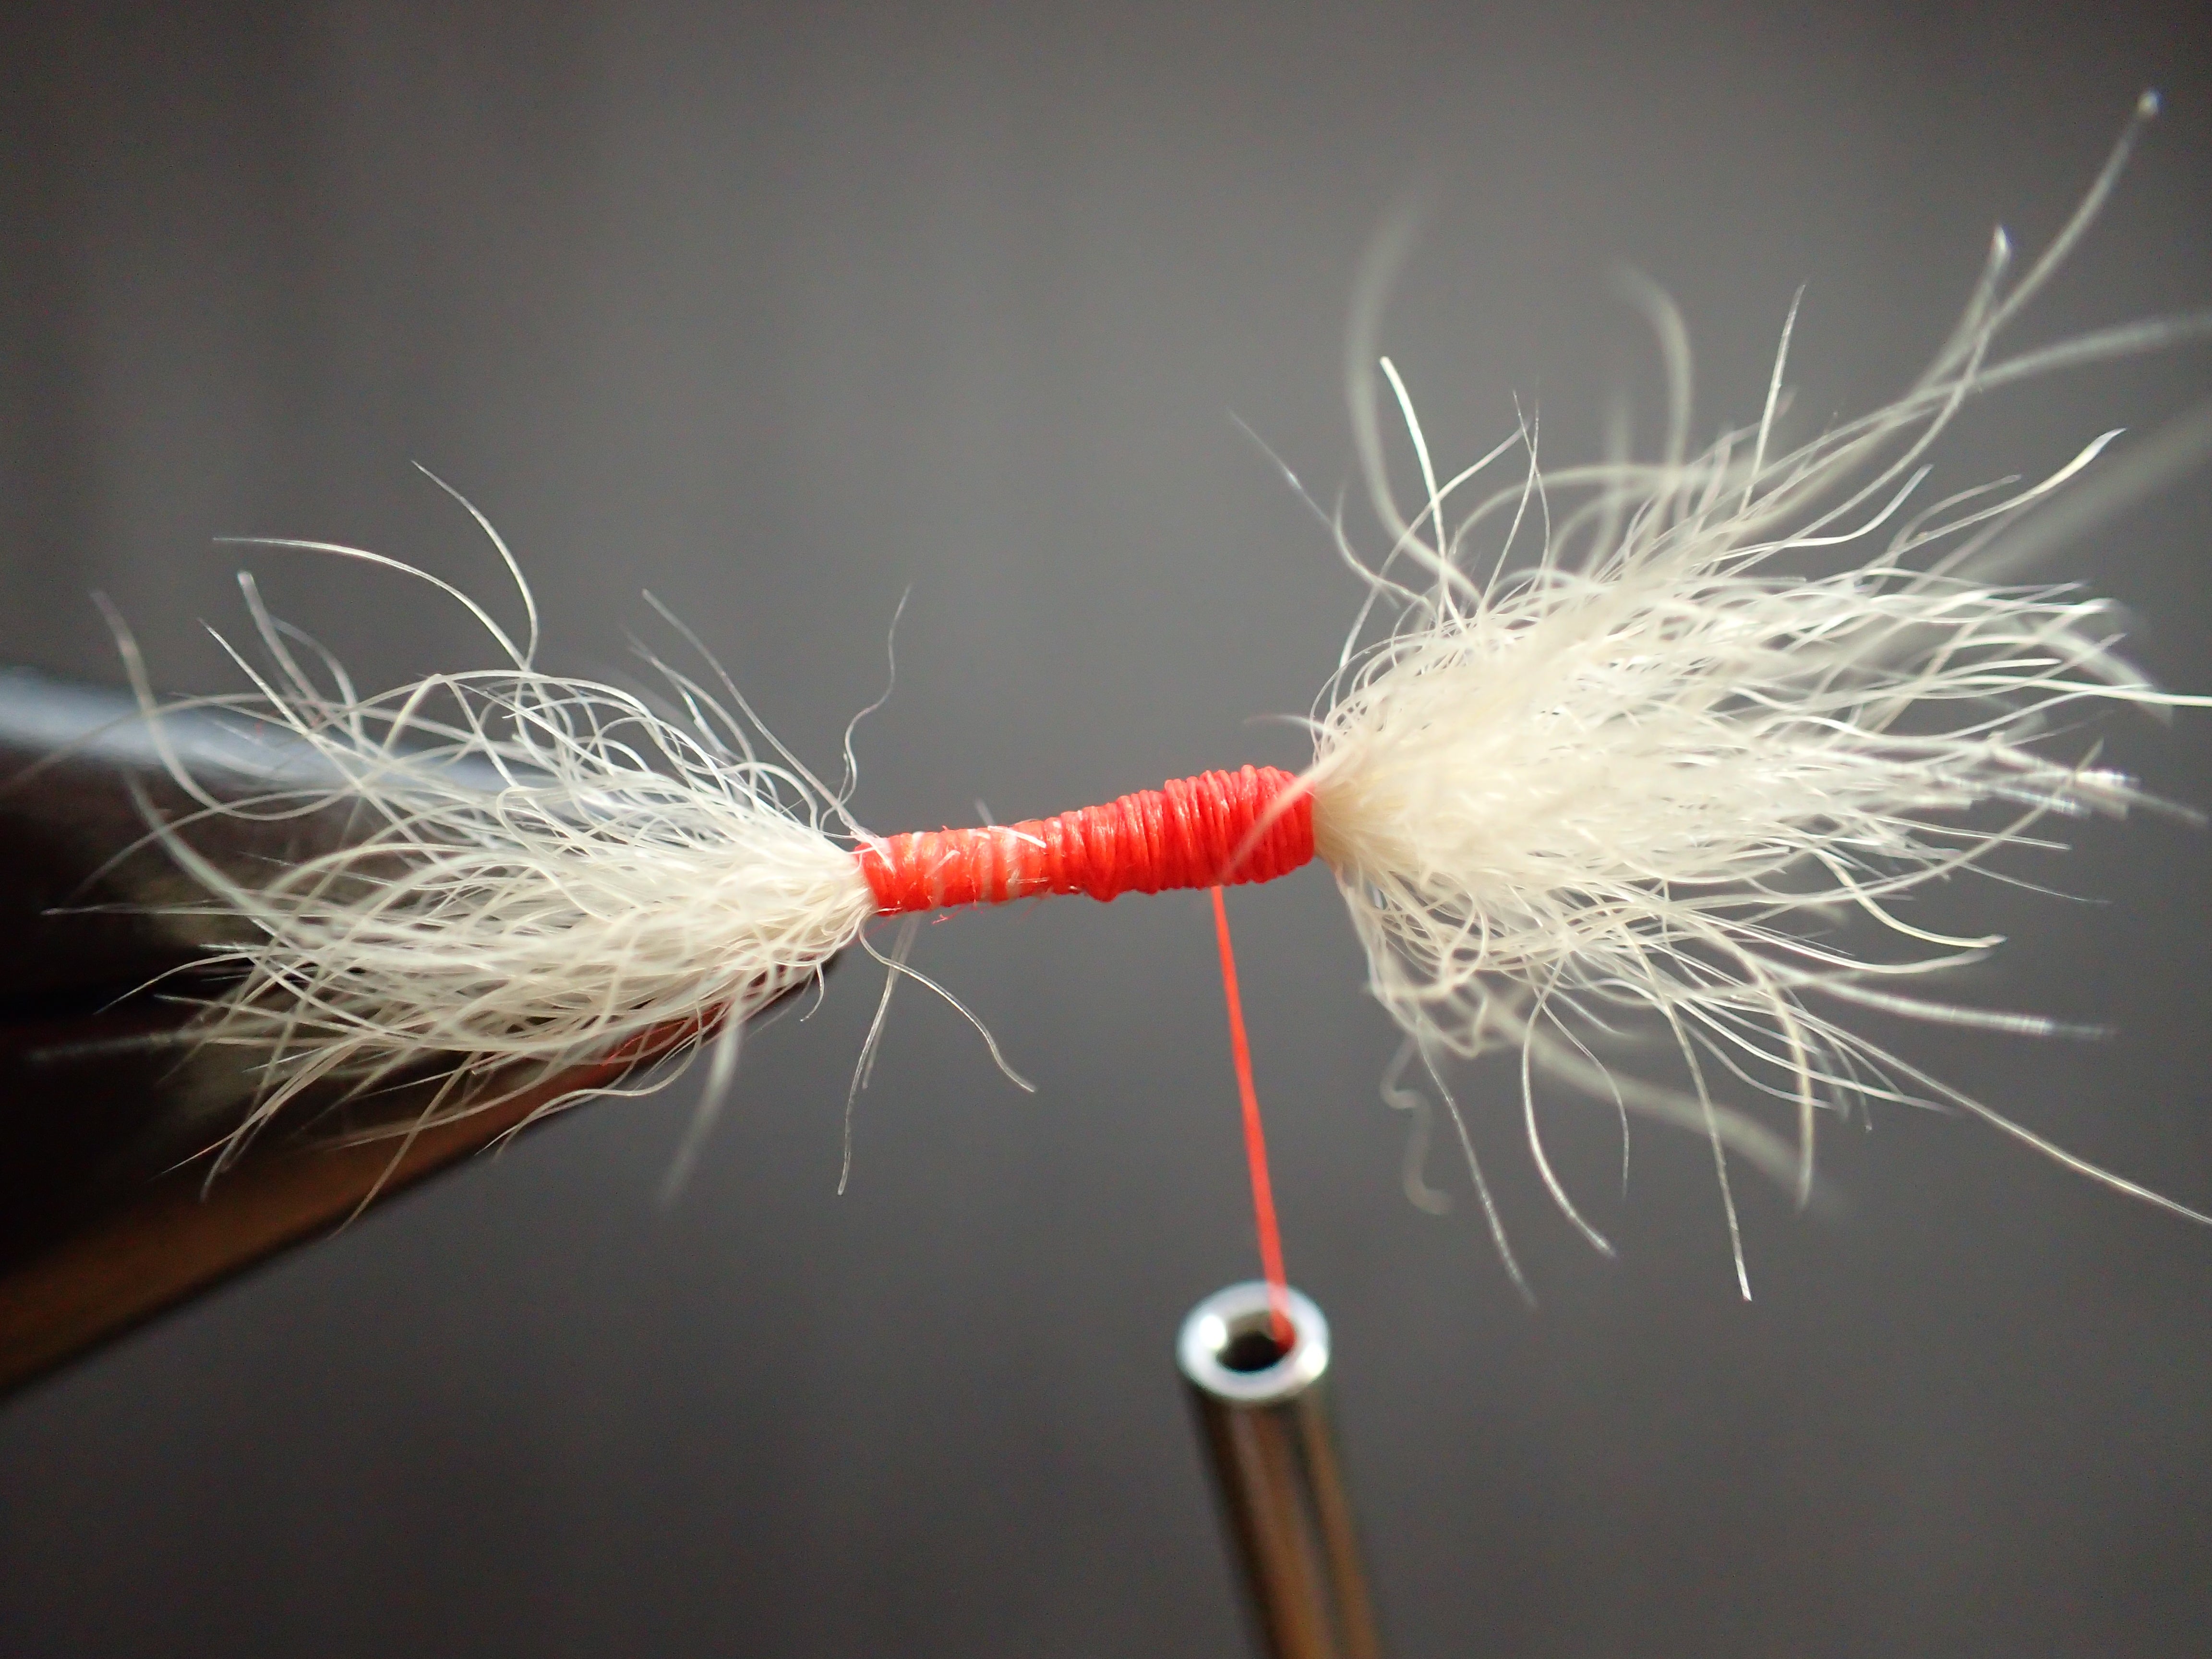
Cut the waste ends, and take just enough wraps to cover the waste ends and build a tapered body.
Step 12


Bring your thread back to the base of the fly and wax your thread. Snowshoe rabbits underfur, like many natural materials has a tendency to bulk up if you try to spin it all at once; so I recommend touch dubbing it on to the waxed thread first. Once you have it touched on you can begin to spin it into a loose dubbing noodle. You don’t want the thread to be completely covered on this pattern as you want it to still show through once the fly is completed.
Step 13


Finish creating the dubbing noodle and build a tapered body going up the hook shank, stopping right behind the wing.
Step 14

Pull the wing back and take a few turns tight to the front of the wing to prop it up at about a 45 degree angle, then build a tiny head. Don’t worry if you find that some of your dubbing has migrated to the front of the wing as long as the hook eye is still clear. You can now whip finish and clip your thread. Your fly is complete!


10 comments
I wish this video had been available when I tied my first Usual. It is exceptionally well explained and photographed.
Thankyou so much for this tutorial, well illustrated and well-tied…Have a great season
This is such an excellent illustration. I first learned about the Usual from Budge Loekle and had unbelievable fishing under a bridge at Roscoe the first time out with it. I use it all the time up in Ontario and rely on it when tied in various colours as a mayfly and caddis imitation. The Usual when floated dry or immersed and retrieved as a submerger is unbeatable.